English
  Russian
  Turkish
  Spanish
  French
  German
  Japanese
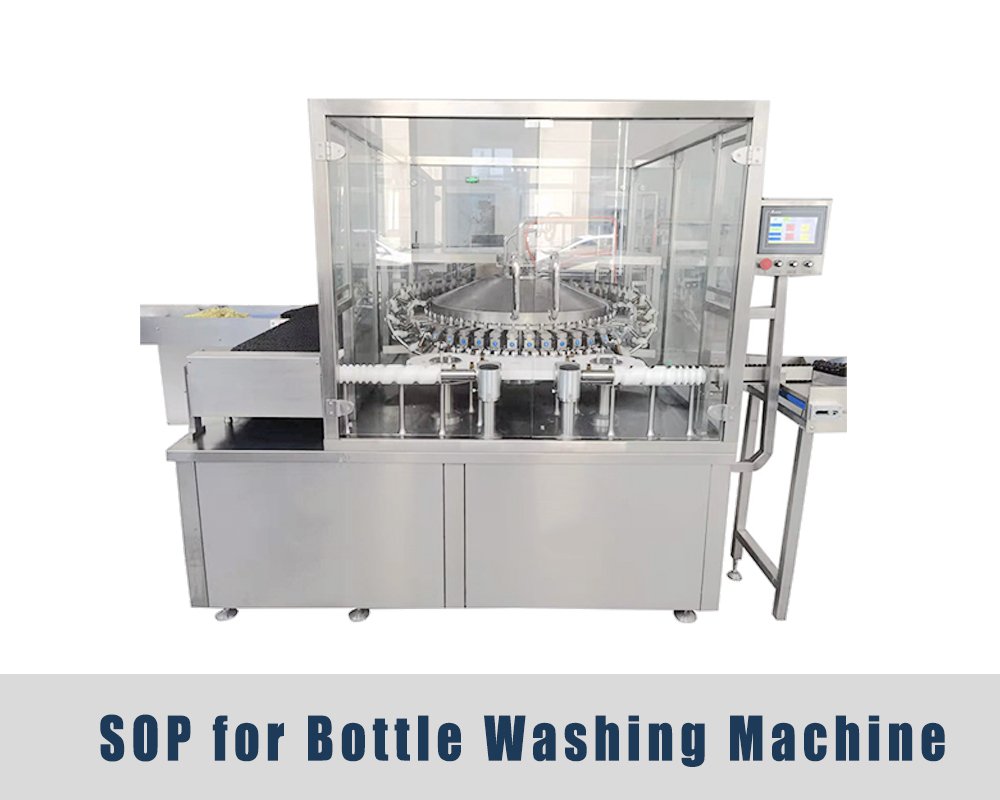
Standard operating procedure of Bottle Washing Machine.
1.0 OBJECTIVE:
To define the Operating Procedure of Bottle Washing Machine used for cleaning glass and plastic bottles before the filling stage.
2.0 SCOPE:
This Procedure covers the Operating Procedure of Bottle Washing Machine used in the production department for primary packaging preparation.
3.0 RESPONSIBILITY:
Machine Operator & Production Officer
4.0 ACCOUNTABILITY:
Head of Production.
5.0 PROCEDURE:
5.1 Inspect the washing area and the machine body. Verify that the “CLEANED” status tag is fixed on the unit before any work begins.
5.2 Make an entry in the Equipment Usage Log. Write the operator name, shift, date, and time of start up.
5.3 Take down the “CLEANED” tag and replace it with the “UNDER PROCESS” tag.
5.4 Collect the Line Clearance form from IPQA. Work cannot begin until this form is signed and dated.
5.5 Safety Precautions:
5.5.1 The machine uses hot water and compressed air at high pressure. Keep hands and face clear of the spray zone at all times.
5.5.2 Never run the washer with side panels open or interlocks bridged. The spray nozzles can cause burns if exposed.
5.5.3 Do not enter the wash tunnel for any reason while the machine is active. Stop the cycle and cut power first.
5.5.4 Avoid contact with the rotating bottle holders. These clamps can pinch or trap fingers during the transfer phase.
5.5.5 Shut off water and air supplies before any cleaning or repair task. Bleed the air line to remove residual pressure.
5.5.6 Do not tamper with the pressure relief valves. Only trained engineers should adjust these.
5.5.7 Wipe down the outer frame and touch screen with a soft damp cloth. Strong solvents can crack the display.
5.5.8 Wear full PPE during operation. This includes a lab coat, waterproof gloves, safety goggles, and closed toe shoes.
5.5.9 Complete the safety system audit listed below on a weekly basis:
5.5.9.1 Confirm that the main isolator cuts all power to the unit when turned off.
5.5.9.2 Verify that the emergency stop on the front panel halts the machine within one cycle.
5.5.9.3 Test the door interlock on each access panel. Opening any panel must stop all motion.
5.5.9.4 Document the audit outcomes in the Safety System Log with your signature.
5.6 Machine Assembly:
5.6.1 Infeed Conveyor & Bottle Loader:
5.6.1.1 The infeed conveyor brings dirty bottles from the unpacking station to the washer inlet. The belt must be free of cracks, glass shards, or loose parts before start up.
5.6.1.2 Load the empty bottles onto the conveyor with the mouth facing up. This keeps debris from falling deeper into the bottle before the wash cycle.
5.6.1.3 The loader arm picks up each bottle and places it into a holding clamp. Confirm that the clamp grip suits the neck size of your bottle.
5.6.1.4 Adjust the loader timing so each bottle enters a clamp without tipping or dropping. A slow loader will leave empty clamps, and a fast loader will crash bottles into each other.
5.6.1.5 Remove any broken or chipped bottles from the conveyor by hand. Do not let damaged glass reach the wash tunnel.
5.6.2 Wash Tunnel and Spray System:
5.6.2.1 The wash tunnel has several stages. Each stage uses a different spray treatment to remove dust, rinse residue, and sanitize the bottle surface.
5.6.2.2 Check each spray nozzle for blockages before the run. A blocked nozzle leaves part of the bottle untouched during the wash.
5.6.2.3 The bottle clamps rotate the bottle through each spray station. The mouth faces downward so water and debris drain out rather than pool inside.
5.6.2.4 Confirm that the internal lance enters each bottle neck during the rinse phase. This lance sprays the inside of the bottle from top to bottom.
5.6.2.5 Inspect the drain lines at the base of the tunnel. Blocked drains will flood the tunnel and stop the cycle.
5.6.3 Water Supply and Pump Setup:
5.6.3.1 The machine draws from three water sources. These are raw water for the first rinse, purified water for the main wash, and water for injection for the final rinse.
5.6.3.2 Check the level in each water tank before start up. Low tanks will cause air to enter the pumps and damage the seals.
5.6.3.3 Open the inlet valves in order: raw water first, then purified, then WFI. Wait for the pressure gauge to stabilize on each line.
5.6.3.4 Set the spray pressure on each line as per the batch record. The standard range is 1.5 to 2.5 kg/cm sq. for external sprays and 2.5 to 3.5 kg/cm sq. for internal lances.
5.6.3.5 Confirm that the WFI line holds its temperature at 80°C or above. Cooler water will not meet the sanitization spec.
5.6.4 Air Blower and Drying Section:
5.6.4.1 The drying section uses filtered compressed air to remove residual water from the bottle. Wet bottles cannot move to the filling line.
5.6.4.2 Check the HEPA filter on the air line for dust loading. Replace the filter if the pressure drop reading is above the set point.
5.6.4.3 Set the air pressure for the drying jets (Standard: 2.0 to 3.0 kg/cm sq.). Higher pressure dries faster but may tip light bottles.
5.6.4.4 The drying lance enters the bottle neck and blows air downward. The force removes droplets from the inner wall and base.
5.6.4.5 Confirm that the exhaust fan is running. Damp air must leave the tunnel or it will condense on clean bottles.
5.7 Wash Cycle Setup:
5.7.1 A full wash cycle has four stages: pre rinse, main wash, purified rinse, and WFI final rinse. Each stage has its own dwell time and pressure.
5.7.2 Enter the cycle times for each stage on the control screen. The values must match the approved recipe for the product being packed.
5.7.3 The pre rinse uses raw water at ambient temperature. Its purpose is to dislodge loose dust and packaging fibers.
5.7.4 The main wash uses purified water at 40 to 50°C. This stage removes trace contaminants and residue left from the glass manufacturing process.
5.7.5 The purified rinse follows the main wash. It clears any carryover from the wash stage with fresh purified water.
5.7.6 The WFI final rinse runs at 80 to 90°C. This stage sanitizes the bottle and meets the endotoxin limit for injectable products.
5.7.7 The total cycle time runs between 90 and 180 seconds per bottle. Shorter cycles risk carryover. Longer cycles slow down the line without added benefit.
5.7.8 Record the pressure, temperature, and dwell time for each stage at the start of the shift. Repeat this check every two hours during the run.
5.8 Starting the Wash:
5.8.1 Energize the main panel with the key switch. The HMI will boot up and show the home screen.
5.8.2 Select the bottle size from the product list on the HMI. The machine will load the matching recipe with the correct pressures, times, and clamp positions.
5.8.3 Compare each recipe value on screen against the signed batch record. The run cannot start if any value is out of spec.
5.8.4 Prime the water lines before the first bottle enters. Run a dry cycle with no bottles for two minutes. This flushes stale water from the previous batch.
5.8.5 Press the Cycle Start button. The conveyor will engage and bottles will enter the tunnel one at a time.
5.8.6 Watch the first 10 bottles exit the dryer. Inspect each one under a light for droplets, streaks, or fibers.
5.8.7 If any bottle fails the visual check, place it in the reject tray. Do not return failed bottles to the line without a second wash.
5.8.8 The output counter on the HMI updates with each bottle that clears the dryer. Track the count against your batch target.
5.9 In Process Checks:
5.9.1 Pull a sample bottle every 30 minutes from the outfeed conveyor. Use clean tongs to avoid any skin contact with the bottle surface.
5.9.2 Hold the sample bottle up to a bright light. Look for water spots, residue, or visible particles inside the bottle.
5.9.3 Perform a swab test on one bottle per hour. Send the swab to the microbiology lab for bioburden analysis.
5.9.4 Check the WFI line temperature every 15 minutes. Readings below 80°C require a hold on the line and a call to the utilities team.
5.9.5 Monitor the spray pressure gauges on the side panel. A sudden drop in pressure points to a blocked filter or a worn pump seal.
5.9.6 Log every in process result in the batch record. Any reading out of range must be flagged for QA review.
5.10 Control Panel Operation:
5.10.1 Switch on the main breaker at the wall and then the control panel isolator.
5.10.2 The HMI main screen shows five tabs: Home, Recipe, Cycle, Trend, and Report. Each tab holds a set of controls for a specific task.
5.10.3 The Home tab displays the live status of the machine. It shows pump state, tank levels, and current cycle step.
5.10.4 The Recipe tab lets you load, edit, or save a wash recipe. Only users with supervisor access can edit a saved recipe.
5.10.5 The Cycle tab controls the run. It has buttons for Start, Stop, Pause, and Reset along with a manual override for each stage.
5.10.6 The Trend tab shows a live graph of pressure and temperature over the last hour. Use this view to spot drift in the process values.
5.10.7 The Report tab prints the shift summary. The report lists total bottles washed, rejects, downtime events, and average cycle time.
5.10.8 Use the Manual mode for setup trials and spray tests. Manual mode lets you trigger one pump or one station at a time without running a full cycle.
5.10.9 Alarms display on a red banner at the top of the HMI. Each alarm has a fault code. Look up the code in the machine manual before you clear it.
5.10.10 Log out of the HMI at the end of your shift. The next operator must log in with their own credentials before any action.
5.11 Reject Handling:
5.11.1 Any bottle that fails the visual check at the outfeed goes into the reject tray.
5.11.2 The machine also has an automatic reject gate on the conveyor. The gate activates if a sensor detects low pressure during the wash stage for a specific bottle.
5.11.3 Sort rejected bottles into two groups:
5.11.3.1 Bottles that can be reprocessed through a second wash cycle.
5.11.3.2 Bottles with chips, cracks, or deep stains that must be discarded.
5.11.4 Place discard bottles in the dedicated glass disposal bin. Do not mix broken glass with general trash.
5.11.5 A high reject rate points to a process issue. Stop the line if rejects exceed the limit listed in the batch record.
5.11.6 Report the reject count at the end of each shift. Include the reject rate and the main cause for each group.
5.12 Shutdown Procedure:
5.12.1 Press the Cycle End button on the HMI. The machine will finish washing any bottles still in the tunnel before it halts.
5.12.2 Close the water inlet valves in reverse order: WFI first, then purified, then raw water. This prevents back flow between the lines.
5.12.3 Drain each water tank through the bottom outlet. Residual water left in the tank can support microbial growth overnight.
5.12.4 Vent the air line and release any stored pressure through the bleed valve.
5.12.5 Shut off the main power at the panel and the wall breaker.
5.12.6 Affix the “TO BE CLEANED” tag on the machine.
5.12.7 Clean the Bottle Washing Machine as per the defined cleaning SOP.
5.13 RECORDS:
5.13.1 Equipment Usage Log.
5.13.2 Batch Production Record.
5.13.3 In Process Check Log.
5.13.4 Safety System Log.
5.13.5 Reject and Rework Log.
5.13.6 Cleaning Record.
6.0 ABBREVIATIONS:
6.1 SOP: Standard Operating Procedure.
6.2 IPQA: In Process Quality Assurance.
6.3 QA: Quality Assurance.
6.4 PPE: Personal Protective Equipment.
6.5 HEPA: High Efficiency Particulate Air.
6.6 WFI: Water For Injection.
6.7 HMI: Human Machine Interface.