English
  Russian
  Turkish
  Spanish
  French
  German
  Japanese
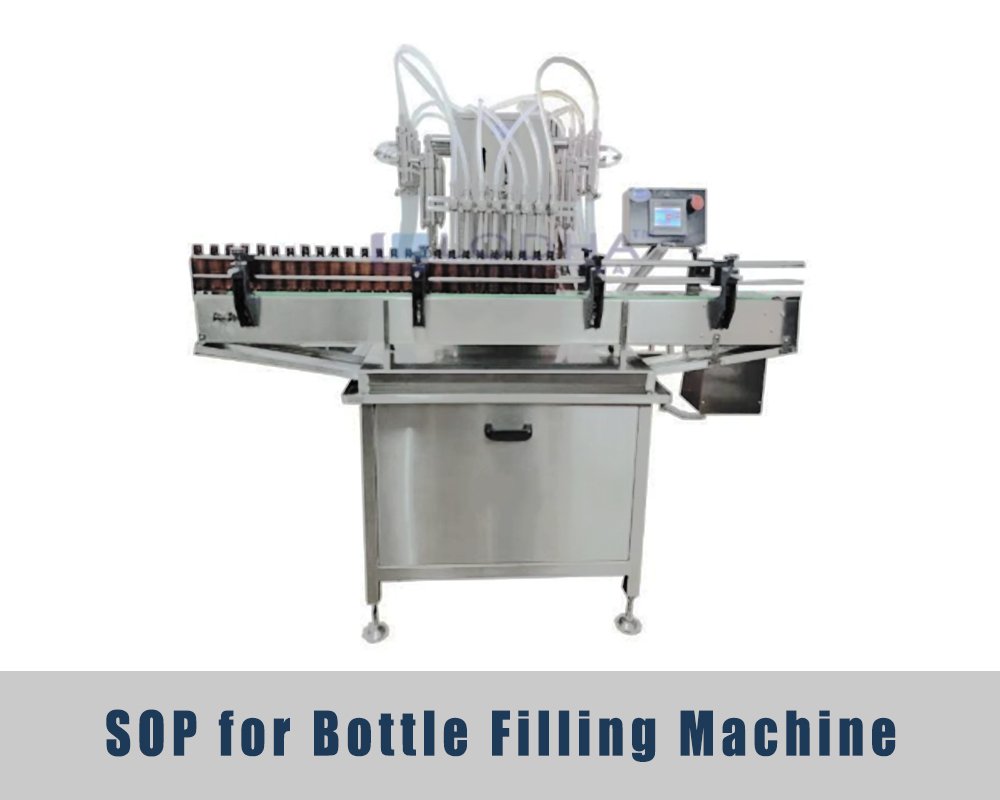
Standard operating procedure of Bottle Filling Machine.
1.0 OBJECTIVE:
To provide the Operating Procedure of Bottle Filling Machine used for filling liquid and solid dosage forms into bottles.
2.0 SCOPE:
This Procedure is applicable to the Operating Procedure of Bottle Filling Machine in the production area.
3.0 RESPONSIBILITY:
Operator & Production Chemist
4.0 ACCOUNTABILITY:
Production Manager.
5.0 PROCEDUR:
5.1 Inspect the work area and the machine. Confirm the “CLEANED” tag is on the machine before you begin any setup.
5.2 Fill in the Equipment Usage Log with your name, the date, and the time of start.
5.3 Remove the “CLEANED” tag. Place the “UNDER PROCESS” tag on the machine in its place.
5.4 Request the Line Clearance form from QA. Do not start production until they sign it.
5.5 Precautions:
5.5.1 Never run the machine in auto mode unless all guards and doors are shut tight.
5.5.2 Do not bypass the safety switches. They protect the operator during normal work.
5.5.3 Do not add, remove, or change parts on the machine without written approval from the engineer.
5.5.4 Never reach into moving parts to adjust, clean, or oil them while the machine is running.
5.5.5 Switch off the main power for setup, tear down, cleaning, and repair jobs.
5.5.6 Do not disable the safety gear on the machine. Report any broken safety device to your supervisor.
5.5.7 Use a soft dry cloth to wipe the panels and outside of the machine. Avoid harsh cleaners.
5.5.8 Wear your PPE before you touch the machine. This includes a lab coat, gloves, and safety glasses.
5.5.9 Perform the safety checks below once per week:
5.5.9.1 Flip the main switch off to verify that power cuts out at the panel.
5.5.9.2 Press the emergency stop button. The machine must halt within one second.
5.5.9.3 Open each safety door in turn. The unit should shut down when any door opens.
5.5.9.4 Record the test results in the safety check book with your signature.
5.6 Assembling:
5.6.1 Bottle Feeder Unit:
5.6.1.1 The bottle feeder connects to the main track of the filling machine. The feeder holds a large batch of empty bottles and sends them onto the track one at a time.
5.6.1.2 Load clean empty bottles into the bottle hopper. Do not load past the top fill line, or bottles may jam in the outlet.
5.6.1.3 Sort out any cracked, dirty, or bent bottles before they enter the feeder. Only bottles that pass a visual check should move on to the fill zone.
5.6.1.4 The feeder uses a rotating disc to orient the bottles. Each bottle turns upright with the neck facing up before it leaves the feeder.
5.6.1.5 Watch the feed belt during the run. Bottles should move with even spacing and no stacking or tipping.
5.6.2 Bottle Track and Guide Rails:
5.6.2.1 Fit the side guide rails to match the width of your bottle. Tight rails keep the bottles straight as they move down the line.
5.6.2.2 Adjust the height of the guide rails based on the size of your bottle. The top of the rail should sit just below the bottle shoulder.
5.6.2.3 The star wheel picks up each bottle and spaces it out for filling. Confirm that the star wheel pockets match your bottle shape.
5.6.2.4 Set the belt speed so bottles arrive at the fill zone at the correct pace. A speed that is too fast will cause overfill, and one that is too slow will back up the line.
5.6.2.5 Test the track by sending five bottles through with no fill. They should slide smoothly from feeder to cap station with no jams.
5.6.3 Fill Nozzles:
5.6.3.1 Select the correct nozzle type for your product. Use thin nozzles for water-like liquids and wide nozzles for thick syrups or solids.
5.6.3.2 Align each nozzle with the bottle neck. The nozzle must drop into the center of the bottle mouth with no contact on the sides.
5.6.3.3 Confirm that all nozzles flow at the same rate. Pump water through them and time how long each one takes to fill a test bottle.
5.6.3.4 Set the dive depth so the nozzle tip enters the bottle but does not touch the bottom. This prevents splash and foam during fast fills.
5.6.3.5 Clean the nozzle tips with a lint free cloth before you start. Dried product on the tip will cause drips and spoil the first bottles.
5.6.3.6 Set the air pressure to push product through the nozzles (Standard: 0.5 to 1.0 kg/cm sq.).
5.6.4 Capping Head:
5.6.4.1 The capping head seals each bottle after it has been filled. Change the head to match the cap type you are using.
5.6.4.2 Set the torque level based on the cap size and bottle material. Plastic caps need less torque than metal ones.
5.6.4.3 Load caps into the cap hopper. All caps must be the same type, color, and size for your batch.
5.6.4.4 The cap sorter lines up the caps so they sit right side up before they reach the capping head.
5.6.4.5 Inspect the cap chute for jams. One stuck cap can halt the whole line.
5.7 Liquid Filling:
5.7.1 The liquid product is loaded into the main tank and pumped to the fill heads through food grade tubing. The level in the tank is tracked by sensors and topped up on its own.
5.7.2 Turn on the stirrer for any product that settles or separates. Syrups, suspensions, and mixed products need constant stirring to stay uniform during the run.
5.7.3 The fill heads draw a set dose from the tank with each cycle. A piston pulls back to load product, then pushes forward to dose it into the bottle below.
5.7.4 Set the fill volume on the control panel. Match the value to your batch record. The volume is changed by turning the stroke knob on the piston drive.
5.7.5 Run a test fill with five bottles. Weigh each one on a calibrated balance and compare the weight to the target.
5.7.6 Adjust the fill head stroke if the volume is off. Small turns make large changes in fill weight, so move the knob in small steps and test again.
5.7.7 Start the main run once the test fills sit within the limits set in the batch record. Log the fill weight check in the in-process log.
5.7.8 Pull sample bottles every 30 minutes during the run. Weigh each sample and record the result in the batch record.
5.8 Solid Filling (Tablets and Capsules):
5.8.1 Load clean tablets or capsules into the feeder bowl. Do not mix different batches or products in the same feeder at any time.
5.8.2 The solid product moves down a vibratory chute to the counting head. The vibration level is set based on the size and shape of the tablet or capsule.
5.8.3 Set the count per bottle on the display. This is the number of tablets or capsules that each bottle must receive for the batch to meet its dose.
5.8.4 The sensors count each unit as it drops through the count head. The machine will stop the flow to that bottle once the correct count is reached.
5.8.5 Test the first 10 bottles by hand. Open each one and count the tablets to confirm that the sensor count matches the actual count.
5.8.6 If the count is off in any test bottle, stop the line at once. Check the sensors for dust, stuck tablets, or faulty wiring before you restart.
5.8.7 Pull sample bottles at set times during the run. Check the count, look for broken tablets, and inspect for any foreign matter.
5.8.8 Add a silica gel packet or cotton wad to each bottle if the batch record requires it. These keep the product dry and prevent damage during shipping.
5.9 Capping & Sealing:
5.9.1 Each filled bottle passes under the capping head. The head spins to thread the cap on and seal the bottle tight.
5.9.2 Set the torque on the capper head based on the cap type. Too much torque will crack the cap or strip the thread. Too little lets air and moisture in.
5.9.3 Check five capped bottles from the first run. Try to open each one by hand. A good seal needs real effort to break.
5.9.4 Use a torque meter once per hour to verify the cap tightness. Record the torque value in the log for each check.
5.9.5 Some batches need a foil seal under the cap. This is heat sealed to the bottle neck as an extra tamper proof layer.
5.9.6 Reject any bottle with a loose cap, tilted cap, cross thread, or missing cap. Place them in the locked reject bin at once.
5.9.7 The reject arm will push off bad bottles on its own if the machine has this feature. Check the arm once per shift to confirm it still works.
5.10 Operation:
5.10.1 Switch on the main power supply at the wall and at the machine panel.
5.10.2 Prime the system before a live run. For liquid products, fill the tubing with product until all air bubbles clear the nozzles. For solid products, let the feeder cycle for one minute to settle the tablets.
5.10.3 Choose the batch recipe from the product menu on the HMI screen. The recipe holds the fill volume, count, speed, torque, and reject limits for your batch.
5.10.4 Review the recipe values on screen. Compare each one to your signed batch record. Only start the run if every value matches.
5.10.5 Press the Start button to begin the run. The machine will cycle through a short warm up before it accepts bottles.
5.10.6 Watch the first 20 bottles closely. Pull them aside and check the fill, cap, and label on each one. Discard any that fail.
5.10.7 The HMI shows live output on the main screen. You can track bottles per minute, total count, and reject count in real time.
5.10.8 The Alarm screen lists any active faults with a time stamp. Clear each alarm before you restart the line. Do not override an alarm without supervisor approval.
5.10.9 The Batch Report screen shows the shift total, the reject rate, and any downtime events. Print this report at the end of each shift for the batch file.
5.10.10 To pause the run, press the Pause button. The line will stop in a safe state with all bottles still on the track. Press Start again to resume.
5.10.11 Use the Manual mode for test fills and setup work. Manual mode lets you cycle one bottle at a time through the fill and cap stations.
5.11 Reject and Sorting Section:
5.11.1 The filled and capped bottles pass through a reject and sorting section before they leave the line.
5.11.2 There are two types of reject systems on this machine:
5.11.2.1 Weight based reject – pushes off low or high fill bottles.
5.11.2.2 Vision based reject – pushes off bottles with no cap, tilt cap, or bad label.
5.11.3 To start the weight reject system, turn on the load cell switch on the main panel. Wait for the cell to zero before any bottles arrive.
5.11.4 Set the upper and lower weight limits based on your batch record. The system will push off any bottle that falls out of this range.
5.11.5 For the vision reject, start the camera unit with the green push button. Confirm that the camera shows a clear live feed of the line.
5.11.6 Once both reject systems are armed, the bottle flow can start. Begin the bottle filling machine.
5.11.7 The bottles move forward down the line. Watch how they pass through the reject zone. If good bottles are being rejected by mistake, check the sensor tuning.
5.11.8 Rejected bottles drop into the reject bin. This bin is locked and only QA staff can open it. The count is logged at the end of each shift.
5.11.9 A rise in rejects over a short time means the machine setup has drifted. Stop the line, find the cause, and fix it before you restart.
5.11.10 Good bottles pass through the reject zone and move on to the packing station. These bottles are then placed into shippers and sent to stores.
5.12 Post Operation:
5.12.1 Affix “TO BE CLEANED” label on the Machine.
5.12.2 Clean the Bottle Filling Machine as per defined Standard Operating Procedure.
5.13 RECORDS:
5.13.1 Equipment Usage Log Book.
5.13.2 Batch Production Record.
5.13.3 In-Process Check Log.
5.13.4 Reject Log.
5.13.5 Cleaning Record.
6.0 ABBREVIATIONS:
6.1 SOP: Standard Operating Procedure.
6.2 QA: Quality Assurance.
6.3 QC: Quality Control.
6.4 PPE: Personal Protective Equipment.
6.5 RPM: Revolutions Per Minute.
6.6 BPR: Batch Production Record.
6.7 HMI: Human Machine Interface.