English
  Russian
  Turkish
  Spanish
  French
  German
  Japanese
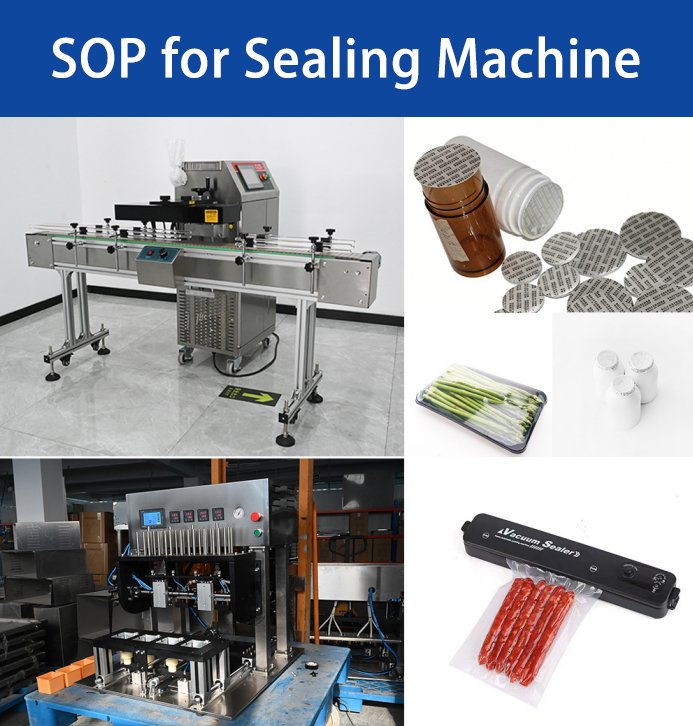
Standard operating procedure of Sealing Machine.
1.0 OBJECTIVE:
To define the Operating Procedure of Sealing Machine used for sealing primary and secondary packaging materials in the production department.
2.0 SCOPE:
This Procedure governs the Operating Procedure of Sealing Machine used for strip sealing, pouch sealing, and blister sealing activities within the packaging line.
3.0 RESPONSIBILITY:
Packing Operator & Production Officer
4.0 ACCOUNTABILITY:
Production In-Charge.
5.0 PROCEDURE:
5.1 Review the packing room and the sealing unit. Verify that the “CLEANED” status tag is present on the machine before the shift begins.
5.2 Post an entry in the Equipment Usage Log. Write down the operator name, the product code, the date, and the time of start.
5.3 Remove the “CLEANED” tag from the machine and put up the “UNDER PROCESS” tag in its place.
5.4 Request a Line Clearance certificate from the IPQA team. Hold the start of the run until the certificate is issued.
5.5 Key Safety Rules:
5.5.1 The sealing rollers and heating elements reach very high temperatures. Keep hands, hair, and loose clothing away from the heat zone at all times.
5.5.2 Never reach into the roller nip or sealing jaws while the machine is powered on. Serious crush injury can occur in a fraction of a second.
5.5.3 Do not block or tape over the photocells, proximity switches, or light curtains. These sensors stop the machine when a hazard is detected.
5.5.4 Wait at least 10 minutes after shutdown before you touch any heated part. The rollers and plates retain heat long after the power is cut.
5.5.5 Only trained electrical staff may open the control cabinet. The cabinet holds live circuits that can cause severe electrical shock.
5.5.6 Use a wooden or plastic scraper to clear stuck material from the sealing area. Never use metal tools near the heating elements.
5.5.7 Clean the outer body with a slightly damp cloth only. Keep liquids away from the motor housings and drive belts.
5.5.8 The operator must wear a lab coat, cut resistant gloves, safety glasses, and a hair net throughout the run.
5.5.9 Complete the safety system review below on a weekly basis:
5.5.9.1 Turn the master isolator off and confirm that all indicator lamps go dark.
5.5.9.2 Push the emergency stop on the main panel. The rollers must stop within one revolution.
5.5.9.3 Break the light curtain with a test rod. The machine should enter a safe state at once.
5.5.9.4 Open each guard door. The drive system must cut power when any door is lifted.
5.5.9.5 Enter the results of the review in the Safety Check Register.
5.6 Setting Up the Machine:
5.6.1 Material Unwind Station:
5.6.1.1 Load the sealing film reel onto the unwind shaft. The core must sit flush against the back plate of the shaft.
5.6.1.2 Check the film type and batch number on the reel label. The film must match the one listed in the Bill of Materials for your batch.
5.6.1.3 Thread the film through the guide rollers as shown in the routing diagram on the machine door.
5.6.1.4 Set the unwind tension using the brake knob. Loose film will wrinkle during sealing. Too tight a setting will snap the film mid run.
5.6.1.5 Confirm that the film edges run parallel to the machine centerline. Misaligned film will cause off center seals.
5.6.2 Heating Station:
5.6.2.1 The sealing machine uses two heated rollers or two heated platens to bond the film layers together. The heat melts a lacquer coating on the film surface so the two sides fuse under pressure.
5.6.2.2 Set the sealing temperature on the control panel. The range sits between 120°C and 200°C depending on the film grade.
5.6.2.3 Allow the heating element to reach its set point before any material is fed through. A warm up time of 15 to 20 minutes suits most machines.
5.6.2.4 Verify the temperature using an external contact probe. The displayed value must match the probe reading within ±3°C.
5.6.2.5 Inspect the roller surface or platen face for scratches, dents, or burnt residue. A damaged surface creates weak spots in every seal.
5.6.3 Product Feeder:
5.6.3.1 The product feeder places tablets, capsules, or sachets onto the lower film in a set pattern. Each pocket or space must hold the correct count for your batch.
5.6.3.2 Adjust the feeder chute to match the size of your product. A wide chute will drop two units per pocket. A narrow chute will skip pockets.
5.6.3.3 Time the feeder to match the film speed. Products must land in each pocket just before the film enters the sealing zone.
5.6.3.4 Inspect the feeder tracks for dust, dried syrup, or fragments of past batches. A dirty track can misfeed or jam the line.
5.6.3.5 Run a short trial with no sealing to confirm that every pocket picks up one product unit. Correct any feeder faults before you turn on the heaters.
5.6.4 Cutting and Embossing Tools:
5.6.4.1 After the seal step, the sealed web passes under a cutting knife or a punch die. This step divides the web into the final packs.
5.6.4.2 Load the correct cutting die for your pack size. Secure the die with the clamping bolts and torque them to the value on the die plate.
5.6.4.3 Check the embossing plate for the correct batch and expiry text. A wrong plate will print the wrong information on every pack.
5.6.4.4 Set the embossing pressure so the text prints clearly without tearing the film. Run five test packs and read the text under a magnifier.
5.6.4.5 Collect all trim waste from the cutting zone. Dispose of the waste per the packaging waste SOP at the end of the shift.
5.7 Seal Parameters:
5.7.1 A good seal depends on three parameters: temperature, pressure, and dwell time. Each one must be set for the film type and product in use.
5.7.2 Temperature controls how much the lacquer coating melts. Too low a setting gives a weak bond. Too high a setting burns the film and causes leaks.
5.7.3 Pressure forces the two film layers together during the seal. Most machines use 3 to 6 bar of pneumatic pressure on the sealing station.
5.7.4 Dwell time is the period the film stays under heat and pressure. Short dwell times work for thin films. Thicker films need longer dwell to reach bond strength.
5.7.5 Enter all three values on the control panel at the start of each run. The values must match the batch packing record before you press Start.
5.7.6 Test the seal by pulling the two film layers apart by hand. A strong seal tears the film itself rather than peels apart cleanly.
5.7.7 Confirm seal quality with a leak test on one pack from each carton. Submerge the pack in a methylene blue solution under vacuum and check for dye ingress.
5.8 Control System:
5.8.1 The control system on the sealing machine uses a touchscreen interface mounted on the front panel. The interface runs on a PLC and links to all sensors, drives, and heaters on the machine through a common data bus.
5.8.2 Power on the system with the main key switch. The interface will display the boot logo followed by the login screen.
5.8.3 Log in with your personal credentials. Each operator has a unique ID that links their actions to the audit trail.
5.8.4 The menu tree has these branches: Production, Recipe, Maintenance, Report, and User. Each branch leads to a set of related functions.
5.8.4.1 Production: holds the start, stop, hold, and resume controls along with the live output counter.
5.8.4.2 Recipe: stores the sealing parameters for each product. Only users with Manager rights can edit a saved recipe.
5.8.4.3 Maintenance: tracks the service due dates and parts replacement history for the machine.
5.8.4.4 Report: prints the batch output summary along with any fault events from the shift.
5.8.4.5 User: manages the operator accounts and access levels on the system.
5.8.5 A trend graph shows the live temperature and pressure readings over the last 60 minutes. Use this graph to spot slow drifts in the process values.
5.8.6 An event log records every button press, parameter change, and fault on the machine. The log cannot be edited by any user.
5.8.7 Log off the system at the end of your shift. The screen will lock and no actions can take place until the next user logs in.
5.9 Running the Production Batch:
5.9.1 Confirm that the heating station has reached the set temperature and the temperature reading on the display is stable. The machine is not ready for production until the heaters hold steady within ±2°C of the target.
5.9.2 Open the Recipe branch and load the product recipe for your batch.
5.9.3 Cross check each loaded value with the approved Batch Packing Record (BPR). Report any gap to the shift supervisor.
5.9.4 Run a trial cycle using five packs with no product inside. Inspect the empty packs for seal quality and embossing clarity.
5.9.5 Load the actual product into the feeder once the trial run passes. Do not skip the trial step even if the setup looks correct.
5.9.6 Press Start on the Production branch. The drive will engage and the first packs will appear at the discharge chute within 20 seconds.
5.9.7 Collect the first 20 sealed packs from the output. Examine each pack for leaks, wrinkles, misprints, or missing product.
5.9.8 Continue the run once the first output meets all quality checks. Take a sample pack at 30 minute intervals during the run.
5.9.9 Keep all samples for QA review at the end of the batch. Do not return sample packs to the main batch stream.
5.10 Rework and Rejects:
5.10.1 Any pack that fails inspection goes into the reject container. The container is clearly marked and kept away from good stock.
5.10.2 The machine also has an auto reject system that pushes off packs with known defects:
5.10.2.1 Weight check reject – triggered when a pack weighs less than the lower limit set on the recipe.
5.10.2.2 Vision check reject – triggered when the camera finds a print defect, a missing product, or a bad seal edge.
5.10.3 Inspect all rejected packs within two hours. Early review helps find any pattern in the defects and fix the root cause fast.
5.10.4 Sort the rejects into rework, scrap, and sample groups:
5.10.4.1 Rework packs can be opened and the product put back into the feeder after a review.
5.10.4.2 Scrap packs have no product value left and must be destroyed per the disposal SOP.
5.10.4.3 Sample packs go to QA for root cause analysis if the defect is new or unusual.
5.10.5 Fill out the Reject Record at the end of each shift. The record must show the total reject count along with the reject category for each pack.
5.11 End of Run:
5.11.1 Press Stop on the Production branch. Wait for the line to clear of all packs before any further action.
5.11.2 Lower the heater set point to zero on the control panel. The heaters will cool down gradually over the next 15 minutes.
5.11.3 Release the roller pressure using the unload lever on the side of the sealing station. This step prevents the rollers from sticking together overnight.
5.11.4 Remove any leftover film from the unwind and rewind shafts. Store the film rolls in the film storage room with their labels intact.
5.11.5 Clear the feeder of any loose products. Return unused products to the bulk store with the proper return form.
5.11.6 Fit the “TO BE CLEANED” tag on the machine.
5.11.7 Clean the Sealing Machine as per the defined cleaning SOP.
5.12 RECORDS:
5.12.1 Equipment Usage Log.
5.12.2 Batch Packing Record.
5.12.3 Seal Quality Test Log.
5.12.4 Safety Check Register.
5.12.5 Reject Record.
5.12.6 Cleaning Record.
6.0 ABBREVIATIONS:
6.1 SOP: Standard Operating Procedure.
6.2 IPQA: In Process Quality Assurance.
6.3 QA: Quality Assurance.
6.4 PPE: Personal Protective Equipment.
6.5 BOM: Bill of Materials.
6.6 BPR: Batch Packing Record.
6.7 PLC: Programmable Logic Controller.